Full Metal Kaiju Hunters Defeat Otachi Badge
Read the grab telegraphs, dodge laterally, and earn the 4.1% public tracker clear.
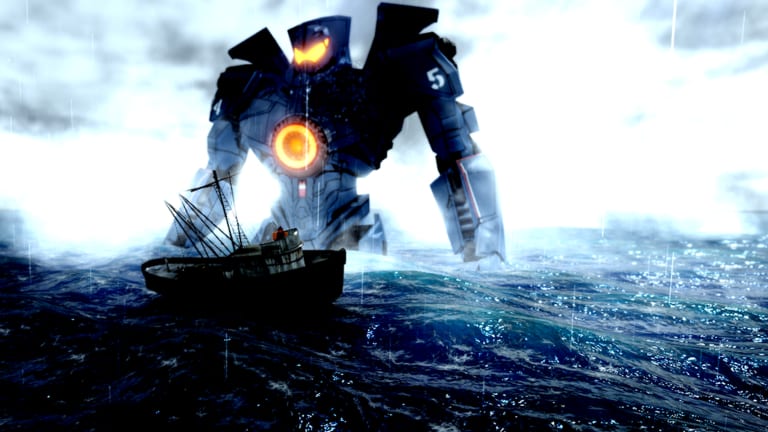
The Defeat Otachi Badge is one of the first serious boss milestones in Full Metal Kaiju Hunters. Public badge trackers list Defeat Otachi with a 4.1% win rate, 4,569 awarded, and a created/updated window around one day ago. The description is simple: You defeated Otachi! Treat those numbers as a public tracker snapshot, not an official patch note, but take the signal seriously: Otachi filters pilots who enter without mobility discipline, without grab reads, and without a loadout that survives displacement.
Otachi matters because it is the fight where Pacific Rim-style reach finally punishes autopilot melee. You cannot fake the clear with a promo code or a Jaeger you barely understand. The badge asks whether your block timing is real, whether lateral dodges are habitual, whether Mag Lock Anchors are slotted, and whether your equipment windows are planned instead of panic-fired. If you need a general boss primer, start with How to Beat Bosses. If Otachi is your specific badge target, this page turns that primer into an attempt loop focused on mobility and grab telegraphs.
What the badge really checks
Otachi is less about one perfect burst and more about not dying to grabs. A weak account can survive the opening swing, then collapse when a tail sweep, a shove, or a grab sequence sends you into clutter or out of the punish lane entirely. A prepared account does not necessarily style on Otachi — it keeps every phase boring enough to repeat. That is the standard you want: fewer heroic saves, more readable exits after every telegraph.
The 4.1% win rate frames expectations. Do not read it as impossible. Read it as a filter for players who back-dodge into walls, who ignore sidestep practice from Combat Controls, or who treat equipment as opening fireworks. The badge becomes realistic when your run has a plan before Otachi appears.
Recommended prep before queueing
First, finish the basics in Getting Started and repair sloppy movement through Combat Controls. Otachi is where backward-only dodging dies. Practice lateral exits until sidestepping feels automatic, not heroic.
Next, build a short farm block with How to Farm DNA until your main Jaeger no longer feels fragile in city maps. If you are coin-capped and mechanically stable, evaluate How to Prestige because permanent stat gains shorten every Otachi cycle.
Bind your kit through the Loadout Planner. Otachi wants uptime, anti-displacement perks, and at least one burst tool assigned to a named window — not dumped the moment the screen gets loud.
Grab telegraphs and mobility focus
Otachi’s danger is reach plus commitment. Learn three reads:
- The grab wind-up — Longer animation, different audio cue, often preceded by a pause. Block or sidestep; do not greed swing through it.
- Tail and sweep arcs — Wide hitboxes that punish backpedaling. Step sideways along the arc, not away from Otachi in a straight line.
- Shove displacement — Knockback that sends you into rubble or off your punish lane. This is where Mag Lock Anchors earn their slot.
If you only practice one skill for this badge, make it lateral dodges. Otachi is the exam for pilots who learned block on Knifehead but never learned spacing on a mobile Category threat.
Mag Lock Anchors and perk board
Slot Mag Lock Anchors from Perks and Upgrades before your first serious Otachi attempt. Electromagnetic footing cuts knockback and displacement — exactly what Otachi tries to create. Pair with Enhanced Stabilizers for faster recovery after heavy hits and Titanium Ribbing if limb damage keeps ending runs early.
Do not treat anchors as a substitute for reading telegraphs. They are insurance when you misread once, not permission to ignore grabs forever.
Equipment window plan
Before the attempt, assign every major tool to a job. Nuclear Air Strike should punish a long exposed stand after Otachi commits — not cover panic at fight start. Bunker Buster belongs to stubborn grounded windows. Attack Helicopter is valuable when you need pressure while rebuilding spacing after a bad dodge. Strafing Runs should cut through lanes Otachi has already committed to.
A simple plan: opener = weapon pressure only, first stable exposure = one burst tool, mid-fight drift = helicopter or strafe, late danger = reserved panic button. If you spend every cooldown in the first twenty seconds, the grab phase becomes a raw stat check you created yourself.
Jaeger choices
There is no honest single best Jaeger promise for Otachi during alpha. Use role fit instead:
- Obsidian Fury fits pilots who want stylish aggression with enough mobility to re-enter after dodges.
- November Ajax remains a practical practice frame when consistency matters more than prestige flexing.
- Cherno Alpha works if you accept slower repositioning but want stagger resistance during trades.
- Midnight Winter can work when dodge discipline is already clean.
- Saber Athena and Apex belong to hunters who understand equipment sequencing, not players hoping the frame carries them.
Pick the Jaeger you can pilot during the ugly second minute — when Otachi’s reach is loudest.
Badge ladder context
Otachi sits before the heavier endurance checks. Treat this badge as proof you can read a mobile boss, then climb toward Defeat Leatherback Badge, Defeat Slattern Badge, and Defeat Mega Kaiju Badge. The full tracker overview lives on Badges and Milestones.
Do not skip Otachi prep and jump straight to Slattern because a thumbnail looked scarier. Slattern assumes you already survived grab-heavy pressure somewhere in your account history.
Common failures
The most common Otachi failure is backward dodging into clutter. If your sidestep sends you into a wall, Otachi did not beat you — your habit did. Another common failure is changing too much after every loss. Keep one setup for at least two focused attempts.
Under-prep shows quickly. If chip damage ruins the run before Otachi’s dangerous windows, return to DNA farming. If your team dies with charges unused, rehearse equipment assignments before spawning. If grabs end every attempt, return to Combat Controls for lateral drill — not a new Jaeger.
Attempt loop
Use a tight loop: warm up on a familiar map, run one Otachi attempt, record the failure in one sentence, adjust only one variable, then run a second attempt. After two wipes, leave and farm or practice sidesteps. Tilt runs teach panic backward dodges. Focused runs teach lateral exits.
When you finally earn Defeat Otachi, bank the lesson before chasing Slattern. The badge proves your hands can read grab telegraphs and your loadout can survive displacement. Your next goal is not louder equipment; it is cleaner movement under longer endurance pressure.
Frequently Asked Questions
Quick answers to the most common questions.
What is the Defeat Otachi Badge?
It is the badge for defeating Otachi. Public trackers show about 4.1% win rate, 4,569 awarded, and a very recent created/updated window.
Why is Otachi harder than early kaiju?
Otachi combines long reach with grab and shove telegraphs that punish backward dodging and autopilot melee greed.
Do I need Mag Lock Anchors for Otachi?
Strongly recommended. Anchors cut knockback and displacement so misreads do not instantly end the run.
Should I fight Otachi before Slattern?
Yes. Otachi is the mobility and grab-read stepping stone before the Category 5 endurance checks.
What causes most Otachi badge failures?
Backward dodging into clutter, ignoring lateral exits, early equipment dumps, and under-prepared DNA or perk boards.
Where should I go after Otachi?
Review notes, return to farming if needed, then prepare for Defeat Slattern Badge and the Badges hub.